
Initiating a Single Instant Payment
Overview
To accept a Single Instant Payment, the customer must authorise it with the bank. The authorisation process is handled through Lean LinkSDK, which provides a secure, user-friendly interface for customers to select their bank, review payment details and confirm the transaction.
After authorisation, the customer will be redirected back to one of your whitelisted urls based on the authorisation outcome.
How it works
-
Create a payment intent using Payment Intents API.
-
Start the payment flow using LinkSDK.
-
The customer selects their bank, reviews the payment details, and authorises it with bank.
-
Handle a customer returning to your application with preconfigured urls.
-
Use captureRedirect() to retrieve and display the payment result screen.
-
Listen for payment state changes using the payment.created and payment.updated webhooks.
Creating a payment intent
The Payment intent is the contract between your backend and Lean to certify that you will request a payment from your customer of a specified amount and currency.
Create a Payment Intent using the Payment Intent API
curl -X POST 'https://sandbox.leantech.me/payments/v1/intents' \
  --header 'Content-Type: application/json' \
  --header 'Authorization: Bearer YOUR_JWT' \
  --data-raw '{
    "amount": 1000.50,
    "currency": "AED",
    "payment_destination_id": "DESTINATION_ID",
    "customer_id": "CUSTOMER_ID",
    "description": "YOUR_TRANSACTION_REFERENCE",
    "purpose_code": "FIS"
  }'
{
"payment_intent_id": "c2f77a7d-fbd1-400a-b4e7-7079b6a87775",
"customer_id": "26b69ba5-0447-45b6-be7d-376d6b432843",
"amount": 1000.50,
"currency": "AED",
"description": "YOUR_TRANSACTION_REFERENCE",
"payments": [],
"payment_destination": {
"id": "XXXXXX-c568-40d7-8710-3e330dXXXXXX",
"bank_identifier": "LEANMB1",
"name": "XXXXXX",
"iban": "AEXXXXXXXXXXXXXXXX",
"display_name": "XXXXXXX",
"account_number": "XXXXXXXX",
"swift_code": "BBMEAEAD",
"status": "CONFIRMED",
"address": "1234 1234",
"country": "ARE",
"city": "Dubai",
"default": true
}
}Return the
payment_intent_idfrom this response to your frontend. It is required to initiate the payment using LinkSDK.
Triggering payment initiation
Use the LinkSDK checkout() function, to start the Single Instant Payment flow.
Pass the payment_intent_id returned from the previous step.
LeanV2.checkout({
  payment_intent_id: "PAYMENT_INTENT_ID",
  access_token: "<YOUR_GENERATED_CUSTOMER_SCOPED_TOKEN>",
  customer_name: "<OPTIONAL_CUSTOMER_NAME>",
  bank_identifier: "<OPTIONAL_BANK_IDENTIFIER>",
  account_id:"<OPTIONAL_ACCOUNT_IDENTIFIER>",
  success_redirect_url: "https://yourapp.com/payment-success",
  fail_redirect_url: "https://yourapp.com/payment-failure",
  risk_details: {}, // Optional, truncated for brevity
});Risk Details Collection
Open Finance regulations require the collection of risk-related metadata to help prevent fraud. The
risk_detailsobject allows you to provide this information. See Risk Details for more information.
Bank selection, payment details and redirection
After initiating the payment, LinkSDK guides the customer through:
- Selecting their bank
- Reviewing payment details
- Redirecting to their bank to authorise the payment
Screen Customisation
Due to Open Finance regulations, customer-facing screens in payment flow, must be certified and offer limited customisation.
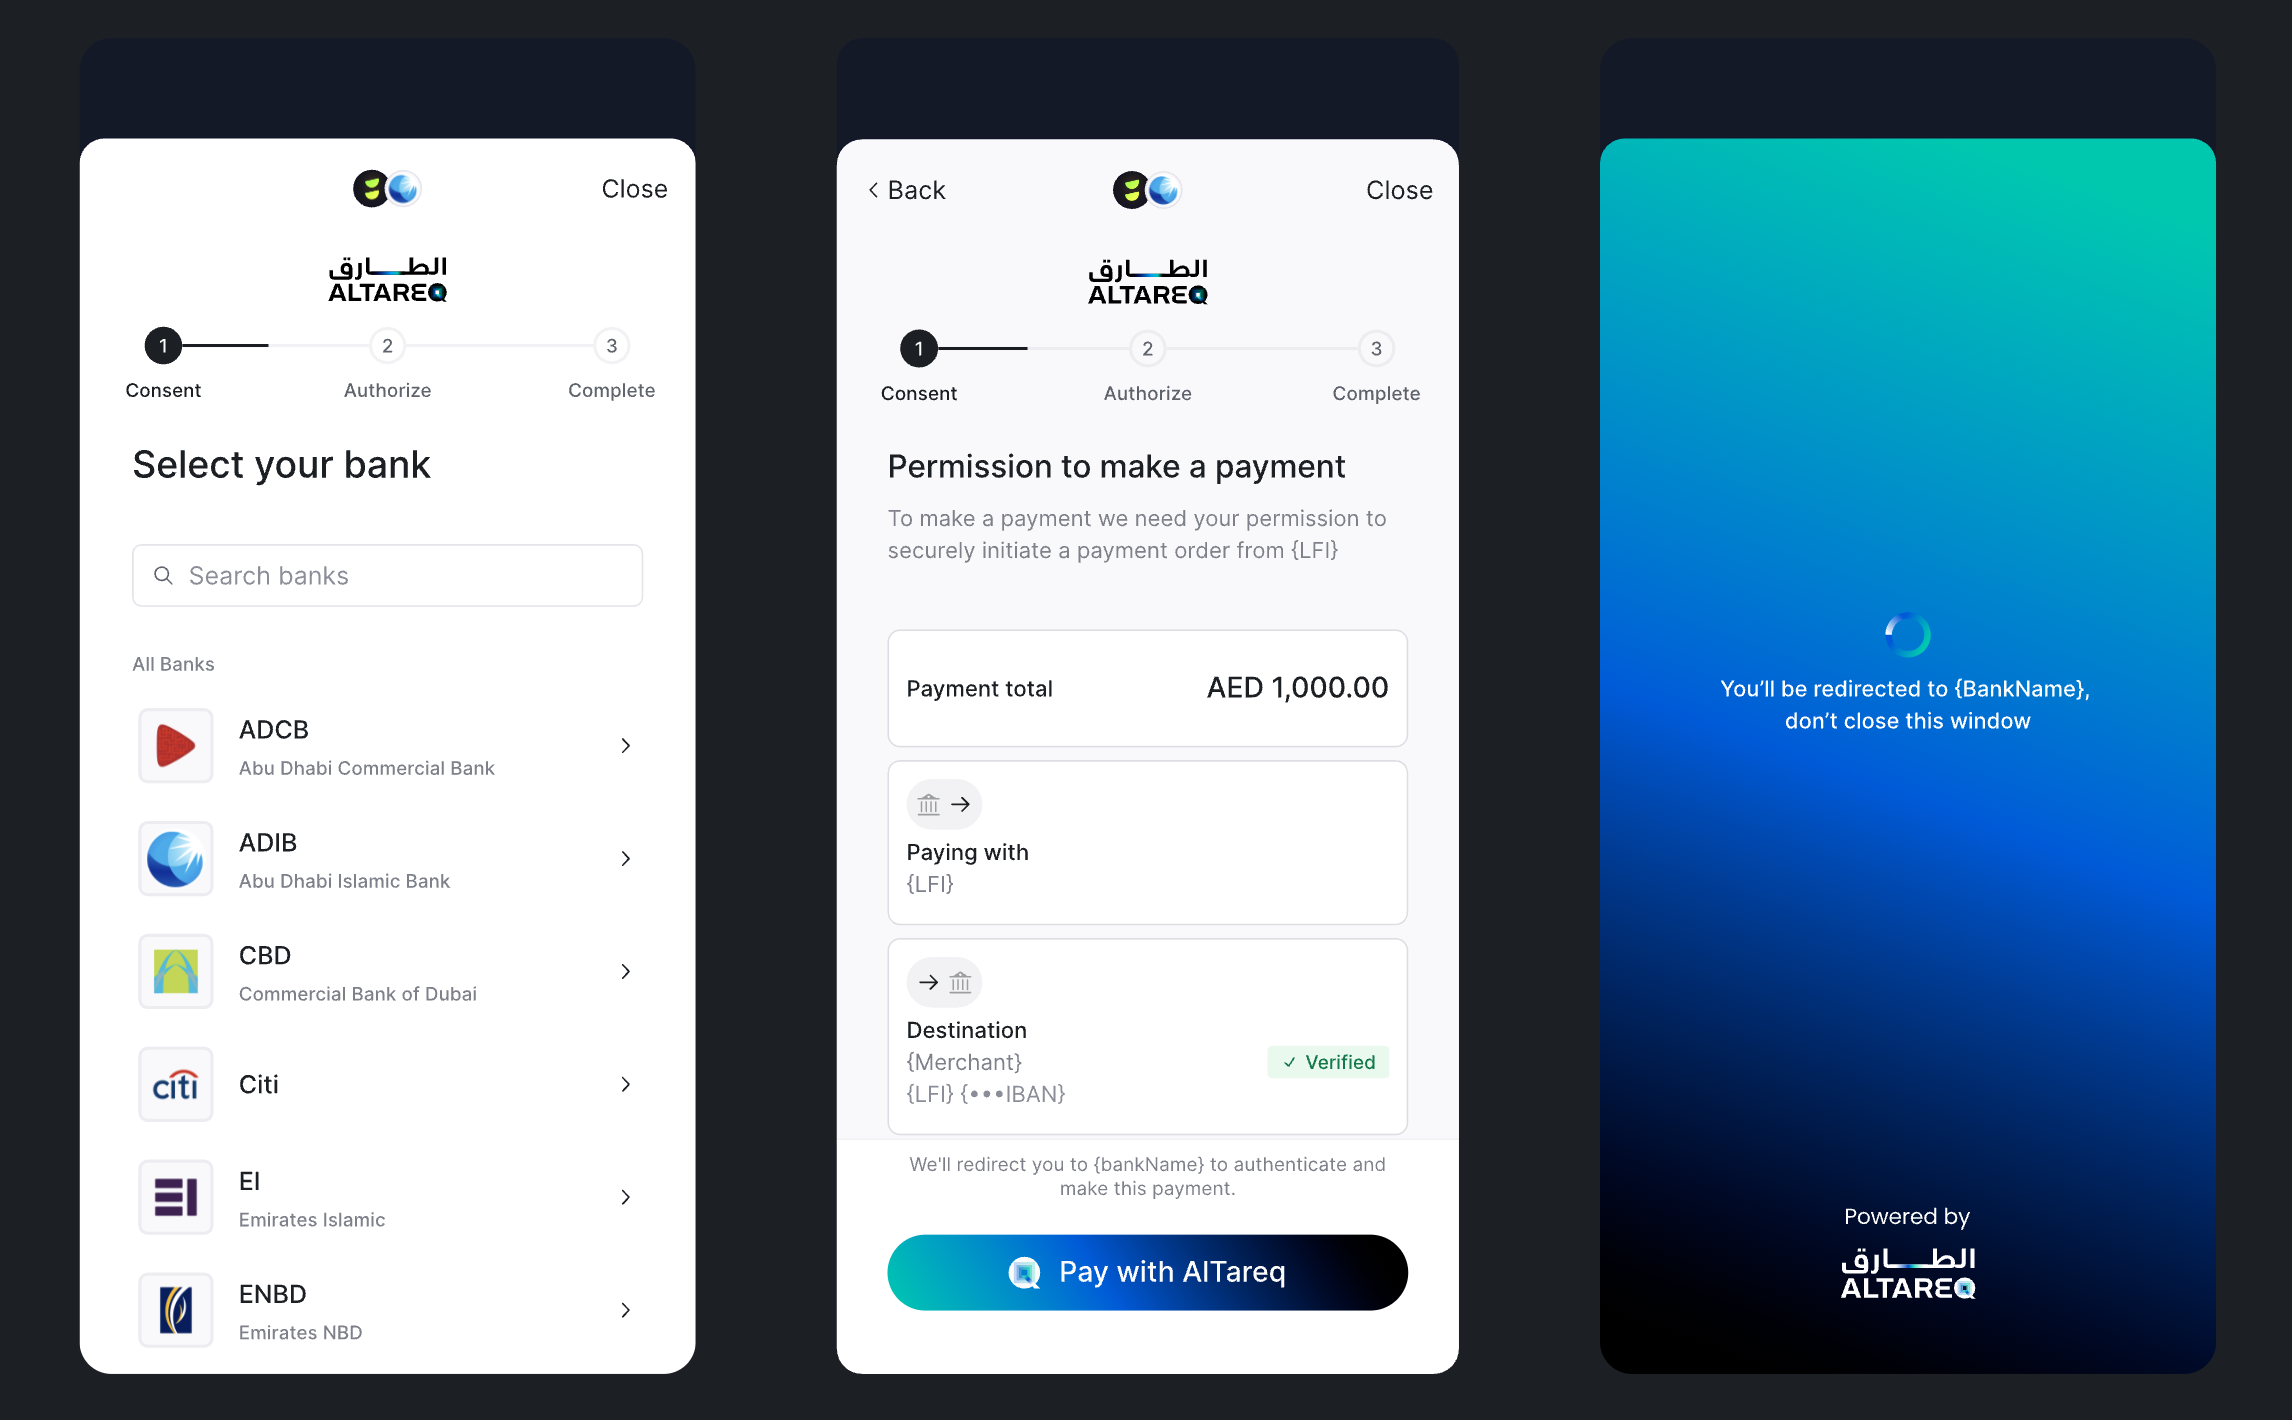
LinkSDKs bank selection, payment details and redirect screens
These steps are fully handled by LinkSDK and use CBUAE certified customer-facing screens.
During the authorisation the customer is being handed over from your application to the bank where they can perform the payment authorisation. The customer will return to your application through a redirect url passed as a parameter to the checkout function.
Using custom bank selection
Use Create your own bank list guide, if you want to provide a custom banks selection screen. Pass resulting
bank_identifierto thecheckoutfunction to skip the default bank selection.
Preselect the user's account and skip bank selection
When (1) the user has an active payment source, and (2) their
customer_idis on the feature flag for that bank's Open Finance connection you can preselect the user's account and skip bank selection by passing the payment sourceaccount_idinto checkout().
- Legacy (reverse-engineering) payment sources can be migrated to Open Finance under the same two conditions to allow you to gracefully migrate users to Open Finance.
- For new users, Lean creates a new payment source per unique bank/account a user pays from — fetch them via
GET customers/v1/{customer_id}/payment-sources.- When checkout() is launched with an
account_idyou can also pass a optionalallow_payment_source_changeparameter which will render a 'Change' button in the Lean SDK allowing the user to select from another payment source linked to the user's customer_id or another new bank/account. See example below.

Link SDK checkout() flow when optional allow_payment_source_change is passed
Displaying Single Instant Payment history to users
Open Finance regulation requires that you provide your users viewing access to their full historic Single Instant Payment history. You must use Lean's consent management interface by embedding the manageConsents() SDK function in your application and allow users to access the interface to view their payment history at anytime.
The
manageConsents()UI screens are regulated and approved by Nebras, the Open Finance regulatory body. Use of Lean's consent management interface is mandatory to remain compliant.
To render the Single Instant Payment history to you your end user only pass consent_type=payment_history into manageConsents() SDK. Read the Consent Management page for more details.
Capturing Redirects and displaying the result page
After the authorisation flow completes, Lean redirects the customer back to your configured redirect URL, appending query parameters that describe the payment outcome. Capture redirect renders immediately, it does not require a loading screen.
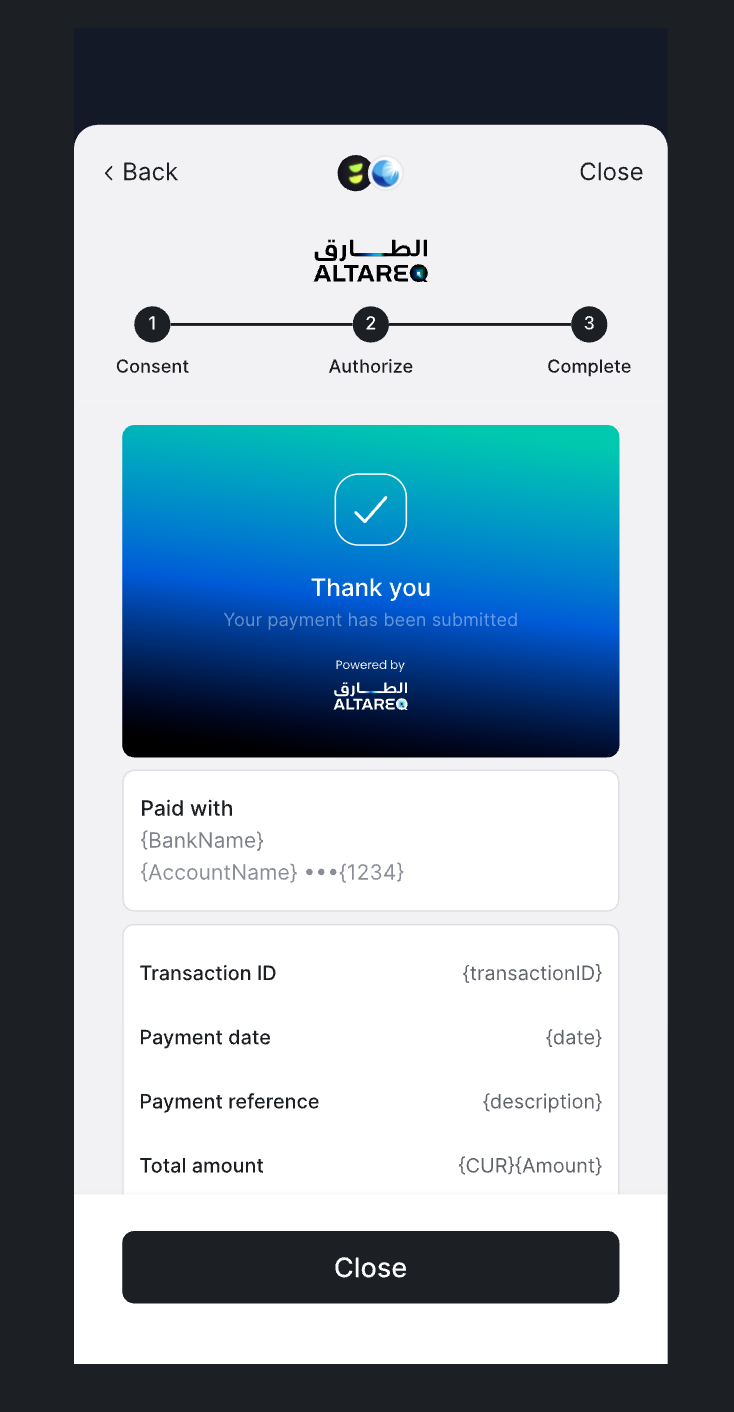
Capture Redirect Screen
To display the final result screen, call captureRedirect() and pass all the parameters received in the redirect:
Lean.captureRedirect({
    app_token: "<your_app_id>",
    bank_identifier: "<from_query_param>",
    consent_attempt_id: "<from_query_param>",
    customer_id: "<from_query_param>",
    granular_status_code: "<from_query_param>",
    status_additional_info: "<from_query_param>",
    sandbox: true,
    access_token: "<customer_scoped_access_token>"
})Note: the success and failure redirect URLs passed into the Dev Portal are not called directly by CaptureRedirect() — they simply route the end user to your pre-built outcome screens. Use CaptureRedirect() SDK function to build those pages on the route in the URLs and ensure they can handle all parameters Lean passes in the redirect URL.
Listening to payment state changes
Open Finance payments emit webhook events as the payment progresses through its lifecycle.
- payment.created is sent when a payment request is created with the bank.
- payment.updated is sent for subsequent status updates.
{
  "type": "payment.created",
  "payload": {
    "id": "f672849b-b4f1-46b1-99cd-80e0bd24c6c0",
    "customer_id": "CUSTOMER_ID_RELATED_TO_PAYMENT",
    "intent_id": "INTENT_ID_RELATED_TO_PAYMENT",
    "status": "PENDING_WITH_BANK",
    "amount": 12.34,
    "currency": "AED",
    "payment_destination_id": "DESTINATION_ID_RELATED_TO_PAYMENT"
  },
  "message": "A payment object has been created.",
  "timestamp": "2025-12-17T13:59:32.008767568Z",
  "event_id": "7d1e3de6-fb8b-4480-8652-903c75b8b8c8"
}
{
"type": "payment.updated",
"payload": {
"id": "f672849b-b4f1-46b1-99cd-80e0bd24c6c0",
"customer_id": "CUSTOMER_ID_RELATED_TO_PAYMENT",
"intent_id": "INTENT_ID_RELATED_TO_PAYMENT",
"status": "PENDING_WITH_BANK",
"amount": 12.34,
"currency": "AED",
"bank_transaction_reference": "528b2b3c-128a-4b51-b50e-31cfc6d7e01b",
"payment_destination_id": "DESTINATION_ID_RELATED_TO_PAYMENT"
},
"message": "A payment object has been updated.",
"timestamp": "2025-12-17T14:00:00.731572845Z",
"event_id": "bb93b16a-f1cd-486d-887e-b63492b4ebdd"
}Configure webhook subscriptions in the Webhooks section of the Application Dashboard.
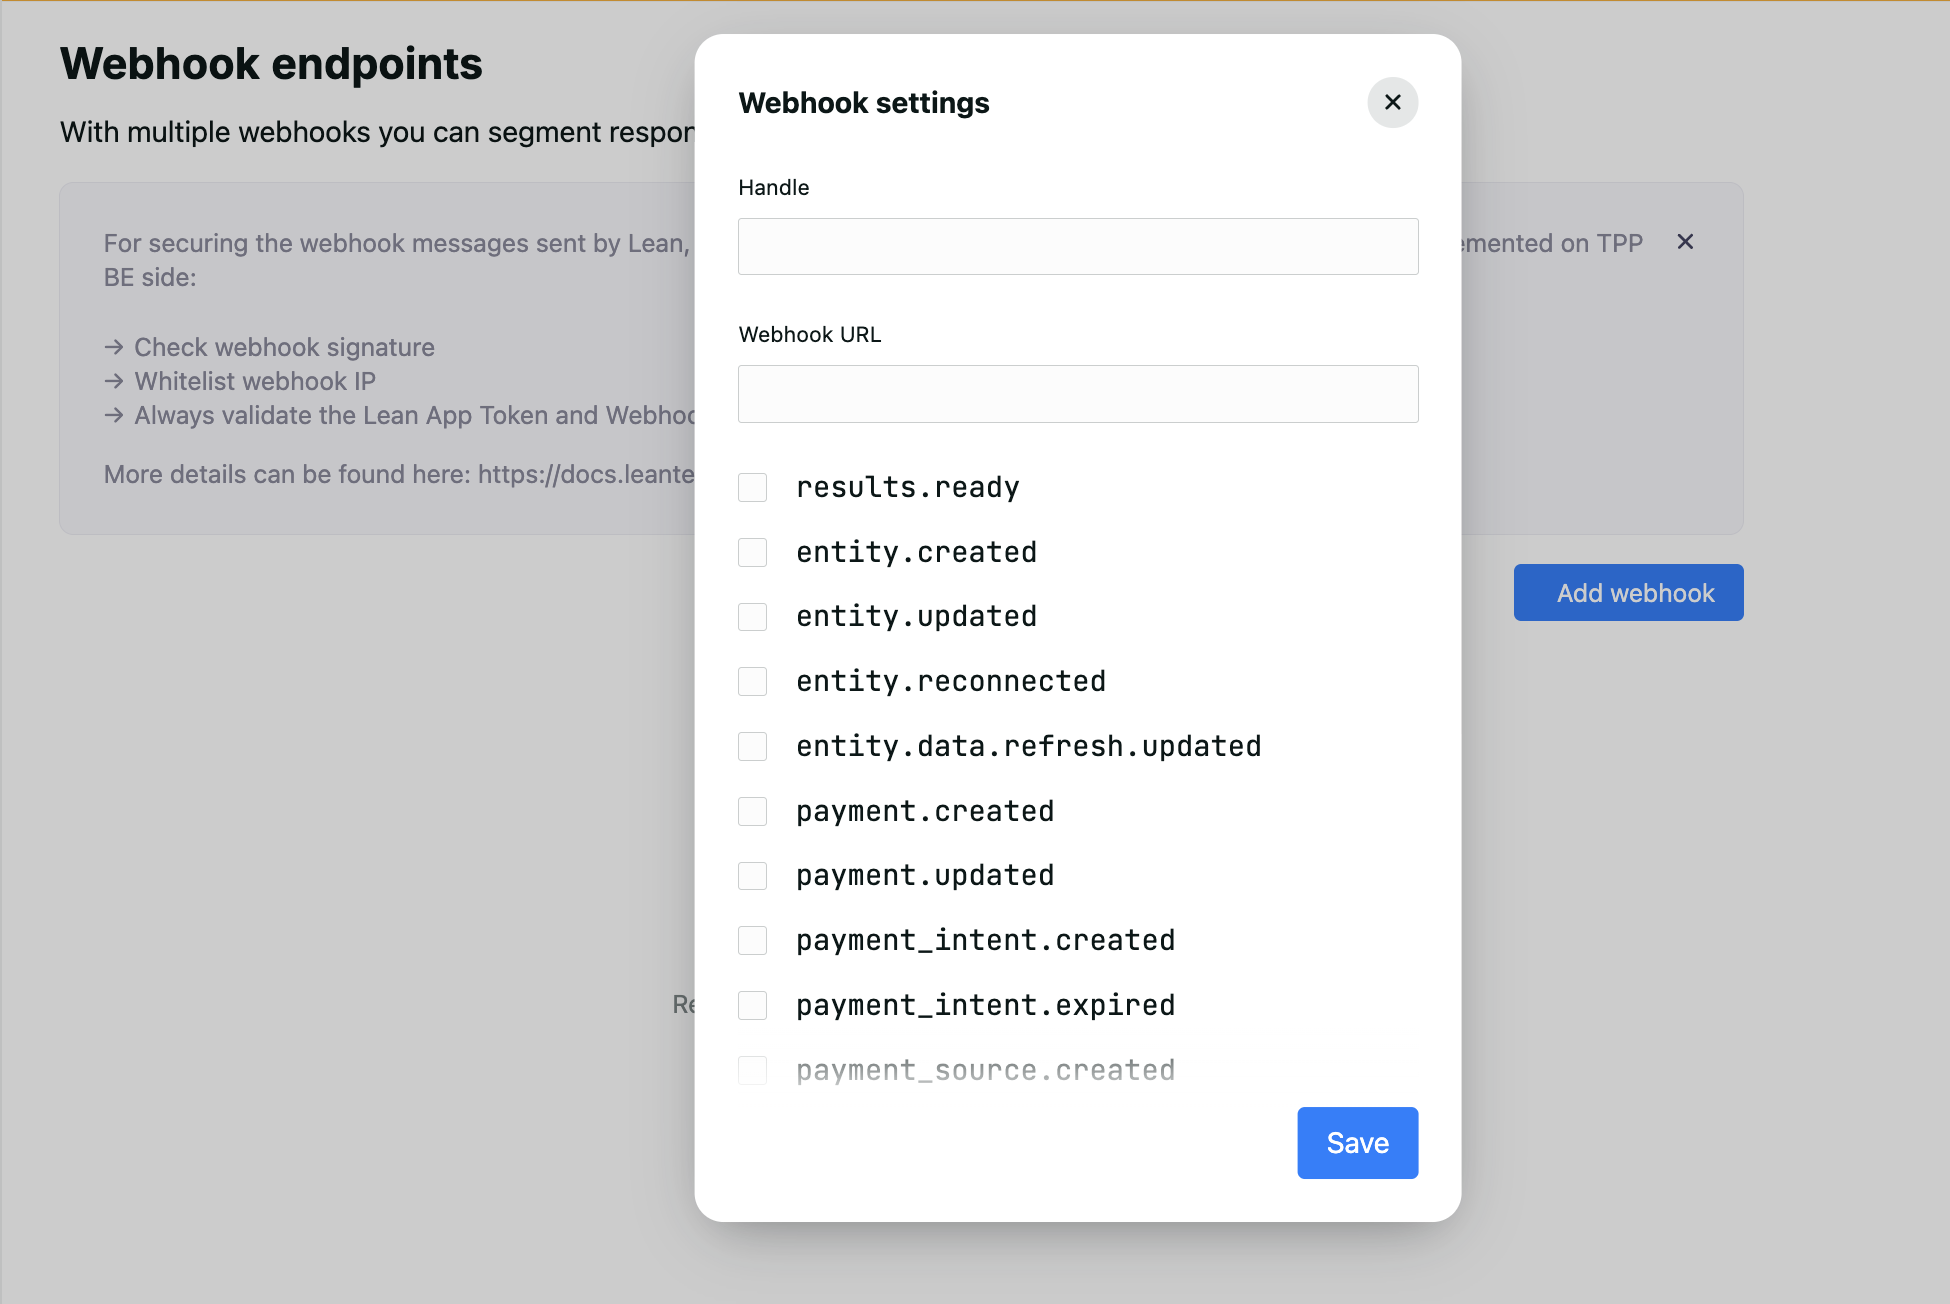
Webhooks panel in Application Dashboard
Updated 25 days ago