
Getting Started with Payouts
Getting access to Payouts
Before Payouts can be used you need to reach out to a Lean representative to enable it.
The first person who signs up on Lean's Application Dashboard is the owner of the account has the additional role Financial Controller which grants access to the Payouts tab in the dashboard. Other users can be invited to join the account and can be given the role Financial Controller so they too can access the Payouts tab. To invite other users head over to the “Team” tab and click on the invite button.
How does Payouts work?
Lean provides multiple ways that you can use payouts that can service any of your business needs and flows. We provide 4 ways to authorise payments from your bank account:
- Manual Authorisation from the Lean Application Dashboard
- Manual Authorisation from your Bank Portal (invite only feature)
- Automatic Authorization
- On Demand Authorization
Lean also supports 2 different mechanisms for initiating payouts and as with the authorization flows you can use both of them at the same time based on your needs:
- Single Payment
- Bulk CSV Payment
Final status
Payouts are asynchronous. Your application should primarily rely on payment.updated webhooks for timely status updates.
Payout objects returned by the Payouts GET endpoints include post_initiation_status.
post_initiation_status is null while tracking is still in progress, then becomes PROCESSED or REJECTED once tracking completes.
You can find more information about the difference between the two mechanisms in these pages:
Making Payouts using Single Payment Mechanism
With the above knowledge in mind you can now start the integration of Payouts into your product.
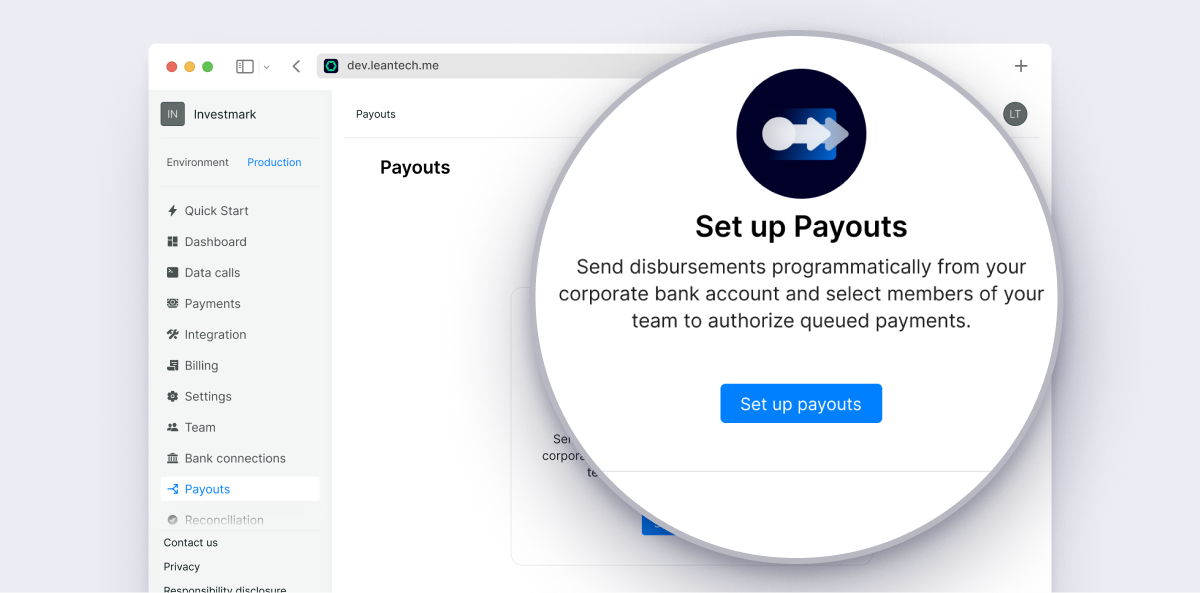
Opt-in for Payouts
After the feature has been enabled you will be able to setup your account for using Payouts. To do so, head over to the Payouts tab and follow the required steps.
You we will need to accepting the additional terms of use which are applicable to Payouts.
Note: Any user on your end with the “Financial Controller” role will have to opt-in in order to use this product. The opt-in process happensonly once for each user via the Application Dashboard. It is your responsibility to ensure that this user has the correct permissions to do so.
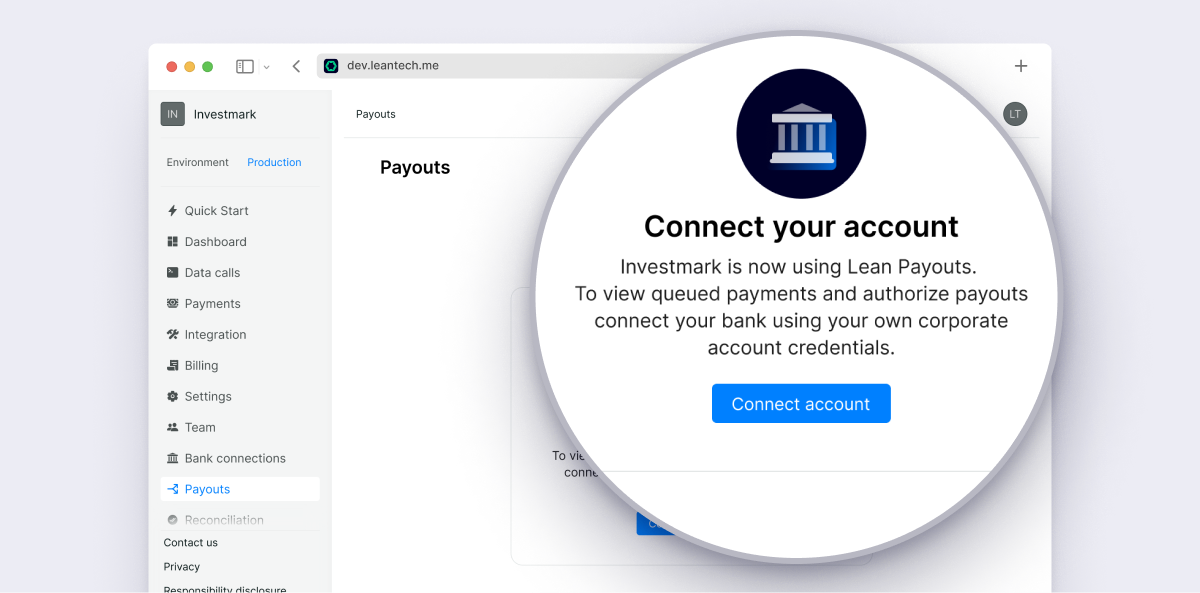
First time connecting your Bank Account
After having opted-in for Payouts, you need to connect your Bank Account (i.e your company’s Client Money Account).
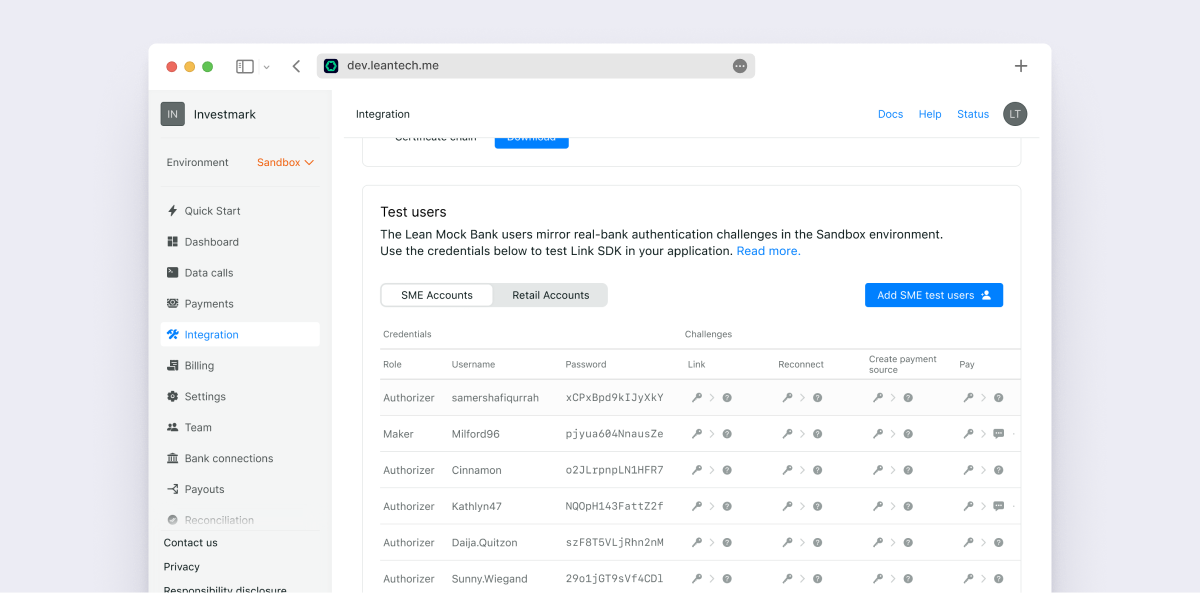
For Sandbox testing, you can go to the "Integration" tab, “Test users” section, switch to "SME Accounts" and then take the credentials to connect to a mock bank account provided by Lean. Once you get the credentials, you can use them in the connect flow in the "Payouts" page as shown in the screenshots below.
Press Connect account - This will launch a window for you to select the correct bank and provide the required bank credentials Lean would use in order to queue & authorize payments and fetch additional post-initiation information about payments.
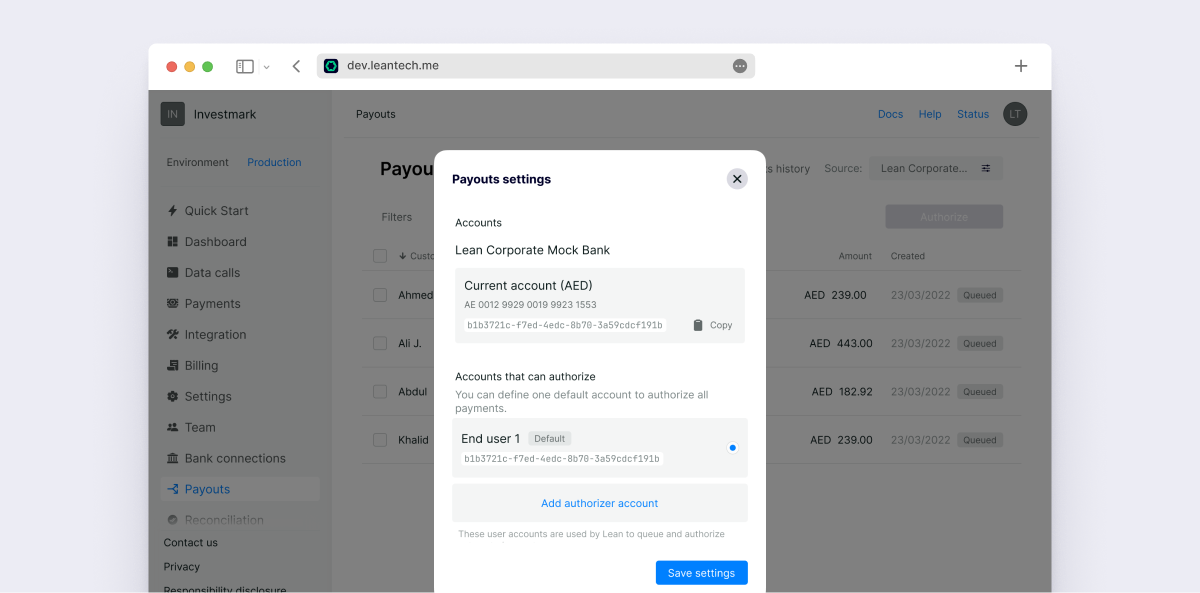
The default authorizer account
Lean needs a set of bank credentials with Authorizer permissions in order to be able to add beneficiaries, queue payments, and authorize them on your behalf. When you connect your bank account the first time, Lean will make the used credentials as the default authorizer and those credentials cannot be used anymore on your Online Banking. Also the Lean user which connected the bank account won't be able to authorize payouts from the Application Dashboard (if they are marked for manual authorization).
Please reach out to your Lean representative if you need to change the default authorizer used for Payouts.
Note: These bank credentials won't be usable for the Manual Approval flow via the Dashboard. You would need a separate Lean Dashboard user (withFinancial Controller role) and bank credentials which you can use to approve queued payouts via Lean's Application Dashboard.
Once your user’s bank account is connected, you will receive a web-hook of type payment_source.created to allow your back-end to know that a successful connection has been made.
Web-hook example:
{
  "payload": {
    "id": "a5c6b1ca-2a1a-317f-9920-7e1bf42ad945",
    "customer_id": "d3fdefba-95cf-4522-83e6-998c8b809e66",
    "status": "ACTIVE",
    "bank_identifier": "ENBD_SME_UAE",
    "bank_name": "Emirates NBD Business",
    "end_user_id": "93b89ff7-528e-46bc-9836-8d3746a2147f"
  },
  "type": "payment_source.created",
  "message": "A payment source was pre-authorized by your customer.",
  "timestamp": "2022-09-15T16:10:07.968233222Z",
  "event_id": "f0dbbcf6-d5cf-4303-9537-17db781e5b42"
}
Retrieving your list of accounts
You need to create a destination before being able to retrieve theaccount_idassociated with the createdpayment_source.
In order to make payouts you need to provide the source account where the money will be sent from. You can find the accounts that the previously connected bank credentials can make payouts from from by clicking on the Source button in the Payouts tab.
Updated 3 months ago
What’s Next
Next we will see how we are going to use the above created object to make a Payout payment